Step 4: Documents
The document management feature in this interface provides a seamless way to upload, organize, and manage your files. Here's an overview of the key functionalities based on the provided images:
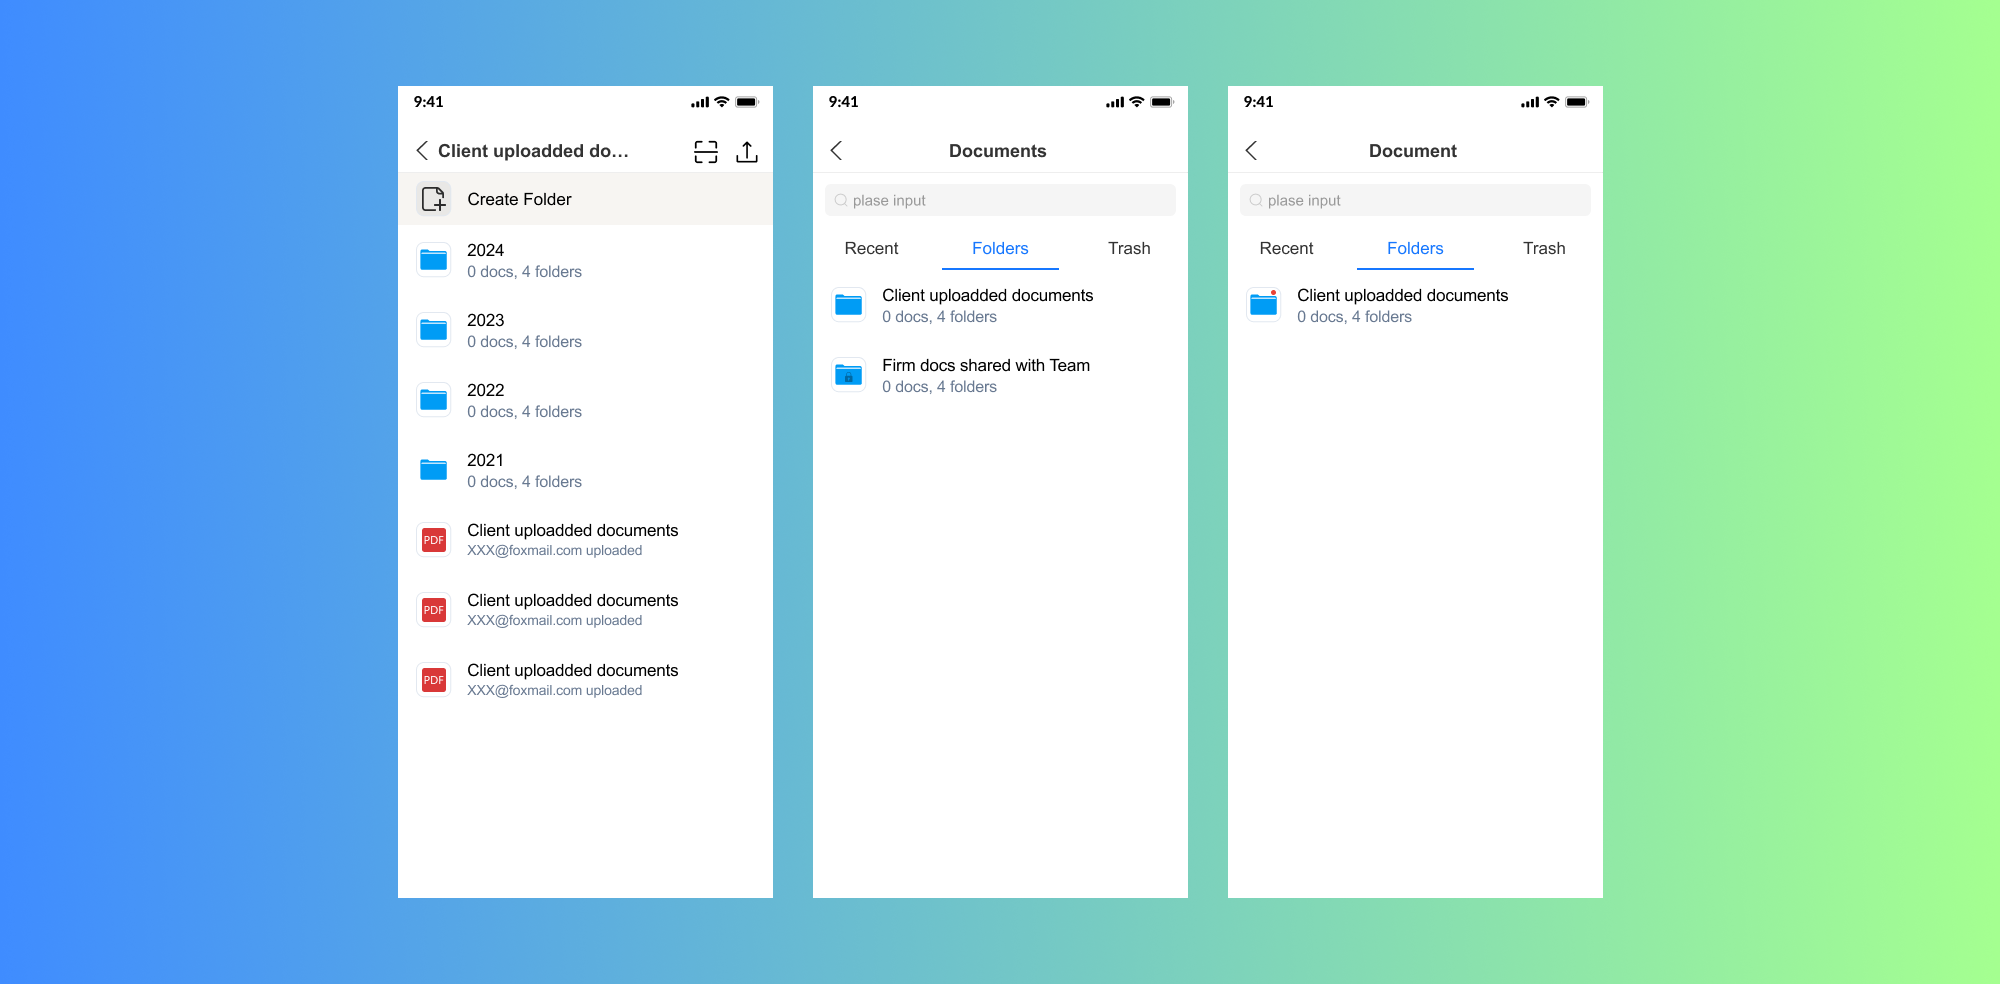
1. Upload and Scan Documents
- Upload: Tap the Upload button to manually upload documents from your device to the system.
- Scan Document: Use the Scan option to capture physical documents and save them directly to the platform.
2. Organize Documents into Folders
- Create Folder: Tap Create Folder to organize your documents. You can select an existing folder as the location for the new one.
- Folder Structure: View folders such as Client Uploaded Documents, Firm Docs Shared with Team, and year-specific folders (e.g., 2024, 2023, 2022, 2021). Easily navigate between folders to locate or categorize files.
3. Recent, Folders, and Trash Views
- Recent: Quickly access recently uploaded or modified documents.
- Folders: Browse through your organized folder structure to locate specific files.
- Trash: View and restore deleted files if needed.
4. File and Folder Actions
- Move Files or Folders: Select a file or folder and move it to a different location within the folder structure.
- Rename: Rename Documents or Folders to maintain clarity and organization.
- Move: Move docs between folders
5. Document Sharing
- Share documents with clients or third parties, even if they do not have portal access.
- Control file visibility to manage who can access specific folders.
note
If clients come to your office with paper documents, you can use a scanner to save their files directly to uTaxes. There are several ways to do this—choose the one that works best for you:
Folders help keep client and internal firm documents organized. uTaxes lets you create unlimited top-level folders with different access levels so that you manage your documents efficiently. Plus, inside each folder, you can create as many folders and subfolders as you need.